Part B · Contacts and groups
How to do the things you actually do, and what happens when you do them. Assumes CRM access.
B1 · Contact management
Finding a contact
Where to find it. CRM → Contacts.
Search by name, email or mobile number, or narrow to a top-level group, a verified state, or whether the record is a physical card. The results list shows each contact's name, email, phone, whether they are active and verified, and a Physical or App pill for how they registered (A2). A small image icon marks a contact who has a photo on file.
Tick rows to act on several contacts at once. The bulk action list beneath the table covers:
| Action | What it does |
|---|---|
| Add to group | As B1 describes for one contact at a time, but for every ticked row. Entitlement pools are not offered here — a pool has no members by design (A4). |
| Remove from group | The same, in reverse. Unlike Add to group, its group picker is not filtered — pools are listed here too, even though nobody is ever a member of one to remove. |
| Disable | Sets each ticked contact to inactive. Asks for confirmation first, since it applies to the whole selection at once. |
| Send offer | Sends one chosen offer to every ticked contact it actually applies to — but "applies to" is checked narrowly: only a group the contact was added to directly, not a group they qualify through by being under it in the tree (A3). Someone who only qualifies by inheritance — a member of a society under a restricted parent group, say — can be silently skipped by this action even though the app shows them the offer. It is not the same check the app itself uses. |
| Verify | See below — not the same as ticking Verified on the Details tab. |
| Send wallet request | Sends a wallet-pass signup prompt to anyone ticked who does not already have one. |
The detail page
Click a row to open the contact. The heading shows their photo (if they have one), their name — or their email, or Contact #\<id> if neither is on file — and underneath it their email, mobile and registration date.
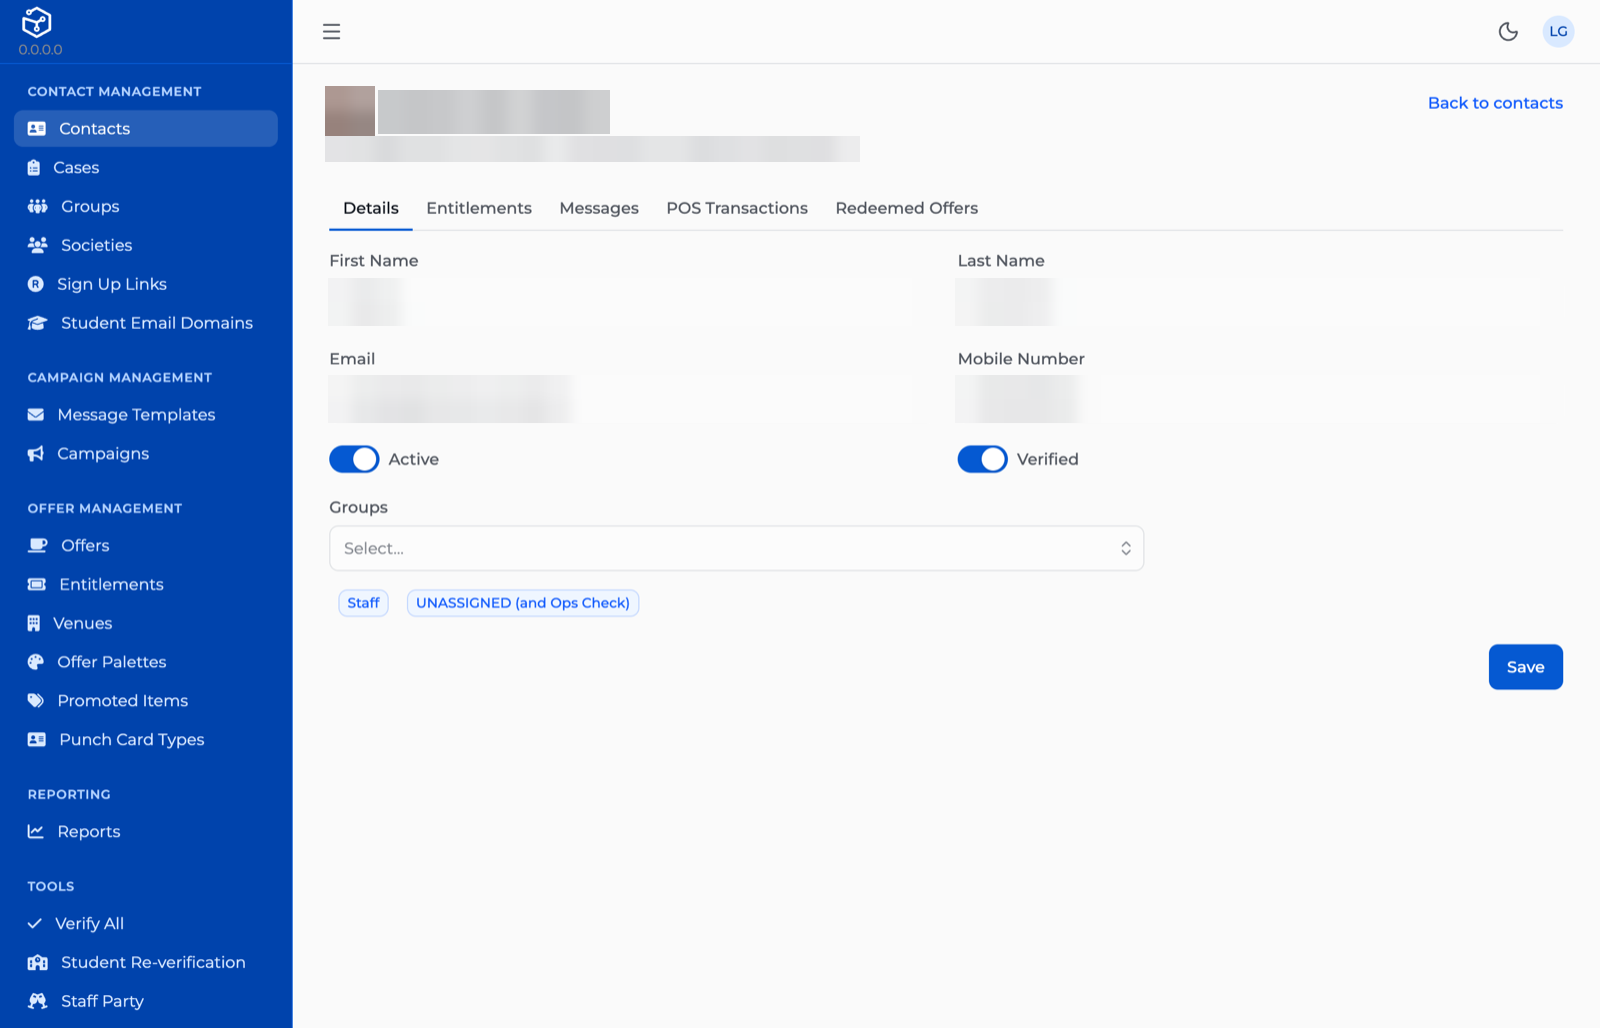
The contact detail page. Everything the rest of B1 acts on is here: the identity fields, the Active and Verified toggles, and the groups they belong to. The personal details are blurred out in this guide — on screen you will see the real ones.
Five tabs sit below the heading: Details, Entitlements (A5's grants, for this one person), Messages, POS Transactions and Redeemed Offers, the last two being read-only history. Details is the one you will use most, and it holds:
- First Name, Last Name, Email, Mobile Number, Active, Verified. Editable if you hold
contact:edit; otherwise the page shows you everything but the fields are locked, with a note that editing needs that role. - Groups. Pick a group to add it, or click an existing chip to remove it. As with the bulk action, entitlement pools do not appear in the picker — you cannot add a contact to a pool this way, because a pool has no members (A4). Saving the form is what actually applies any group changes you have made.
Date of birth is not one of them. It is part of the contact record (A2), but the Details tab neither shows it nor lets you change it — see age gating, below, for what depends on it.
Verification
A contact is Verified or not — the same state the app itself sets when someone confirms their own sign-up. There are two ways to change it from the CRM, and they do not do the same thing.
- Ticking Verified on the Details tab and saving. This only changes that state. Saving the form does the ordinary contact save, applying the fields and groups on the form — nothing else. No offer is sent, and nothing is shown to say otherwise.
- The search list's Verify bulk action. This changes it and, for a contact who arrived through a registration source (A2), sends them that source's sign-up offers there and then — the confirmation dialog says as much. It only fires on the change from unverified to verified: running it again on someone already verified does nothing, so re-selecting a mixed batch will not resend anything to the ones it already caught.
The two are not interchangeable.
Ticking Verified on one contact's Details tab and saving sends them nothing. Using the bulk Verify action on that same contact sends their sign-up offers. If the point of verifying someone is to release those offers, use the bulk action — even for one contact — not the checkbox.
Duplicate accounts
There is no CRM screen for merging two contacts. Merging is primarily something that happens on its own today, when someone claims an account in the customer app, once they have proved by SMS that a mobile number is theirs. A behind-the-scenes tool sits alongside that — start a merge, list what is pending, cancel one — but nothing in the CRM is built on top of it. If two contacts genuinely need merging by hand, that is a request to engineering today, not an action here.
Photo and age
If a contact has submitted a photo, clicking their avatar at the top of the detail page opens it full-size, with a Delete Photo option. That is the only thing the CRM does with it — there is no upload here. A customer's photo comes from the app itself, and is only stored once a facial-recognition check has accepted it. Whether a contact needs one on file at all is decided by the groups they belong to, not by anything you set on the contact: any group can be marked with Require Photo ID, which then applies to everyone in it.
Age works the same way, one level up: a contact's date of birth — entered by the customer, not by you — is all that decides whether the app treats them as an adult. There is nowhere on the contact record in the CRM to see or correct that date today.
Bulk contact import
Where to find it. CRM → Contacts → CSV Upload.
A2 covered the three routes a contact arrives by in normal running. This is a fourth, deliberately left out of that chapter because it is something an operator does, not something that happens on its own.
- Open CSV Upload from the Contacts page. Download the template from the dialog if you need it.
- Choose the group every row will be added to. As elsewhere, pools are not offered — they have no members to add.
- Choose the file and press Upload.
The file needs exactly four columns: First Name, Last Name, Mobile Number and Email Address. For each row, the mobile number is matched against existing contacts: a match is added to the chosen group (if not already in it) and otherwise left alone — a different name or email in the file does not overwrite what is already on record. No match creates a new contact, active but not yet verified, in the chosen group straight away.
One bad row stops the whole file.
Every row is checked for all four fields before anything is written. If even one row is missing a name, mobile number or email address, the upload is rejected outright and nothing from the file is imported — not just the bad row. Fix the file and upload it again.
A second, narrower CSV tool lives at CRM → Staff Party (admin only) for one-off event guest lists. Its file carries a Type column, and it sorts each row into one of two fixed groups depending on whether that column reads "Staff Member" — you do not choose the destination group, and it is not covered further here.
B2 · Group management
Where to find it. CRM → Groups.
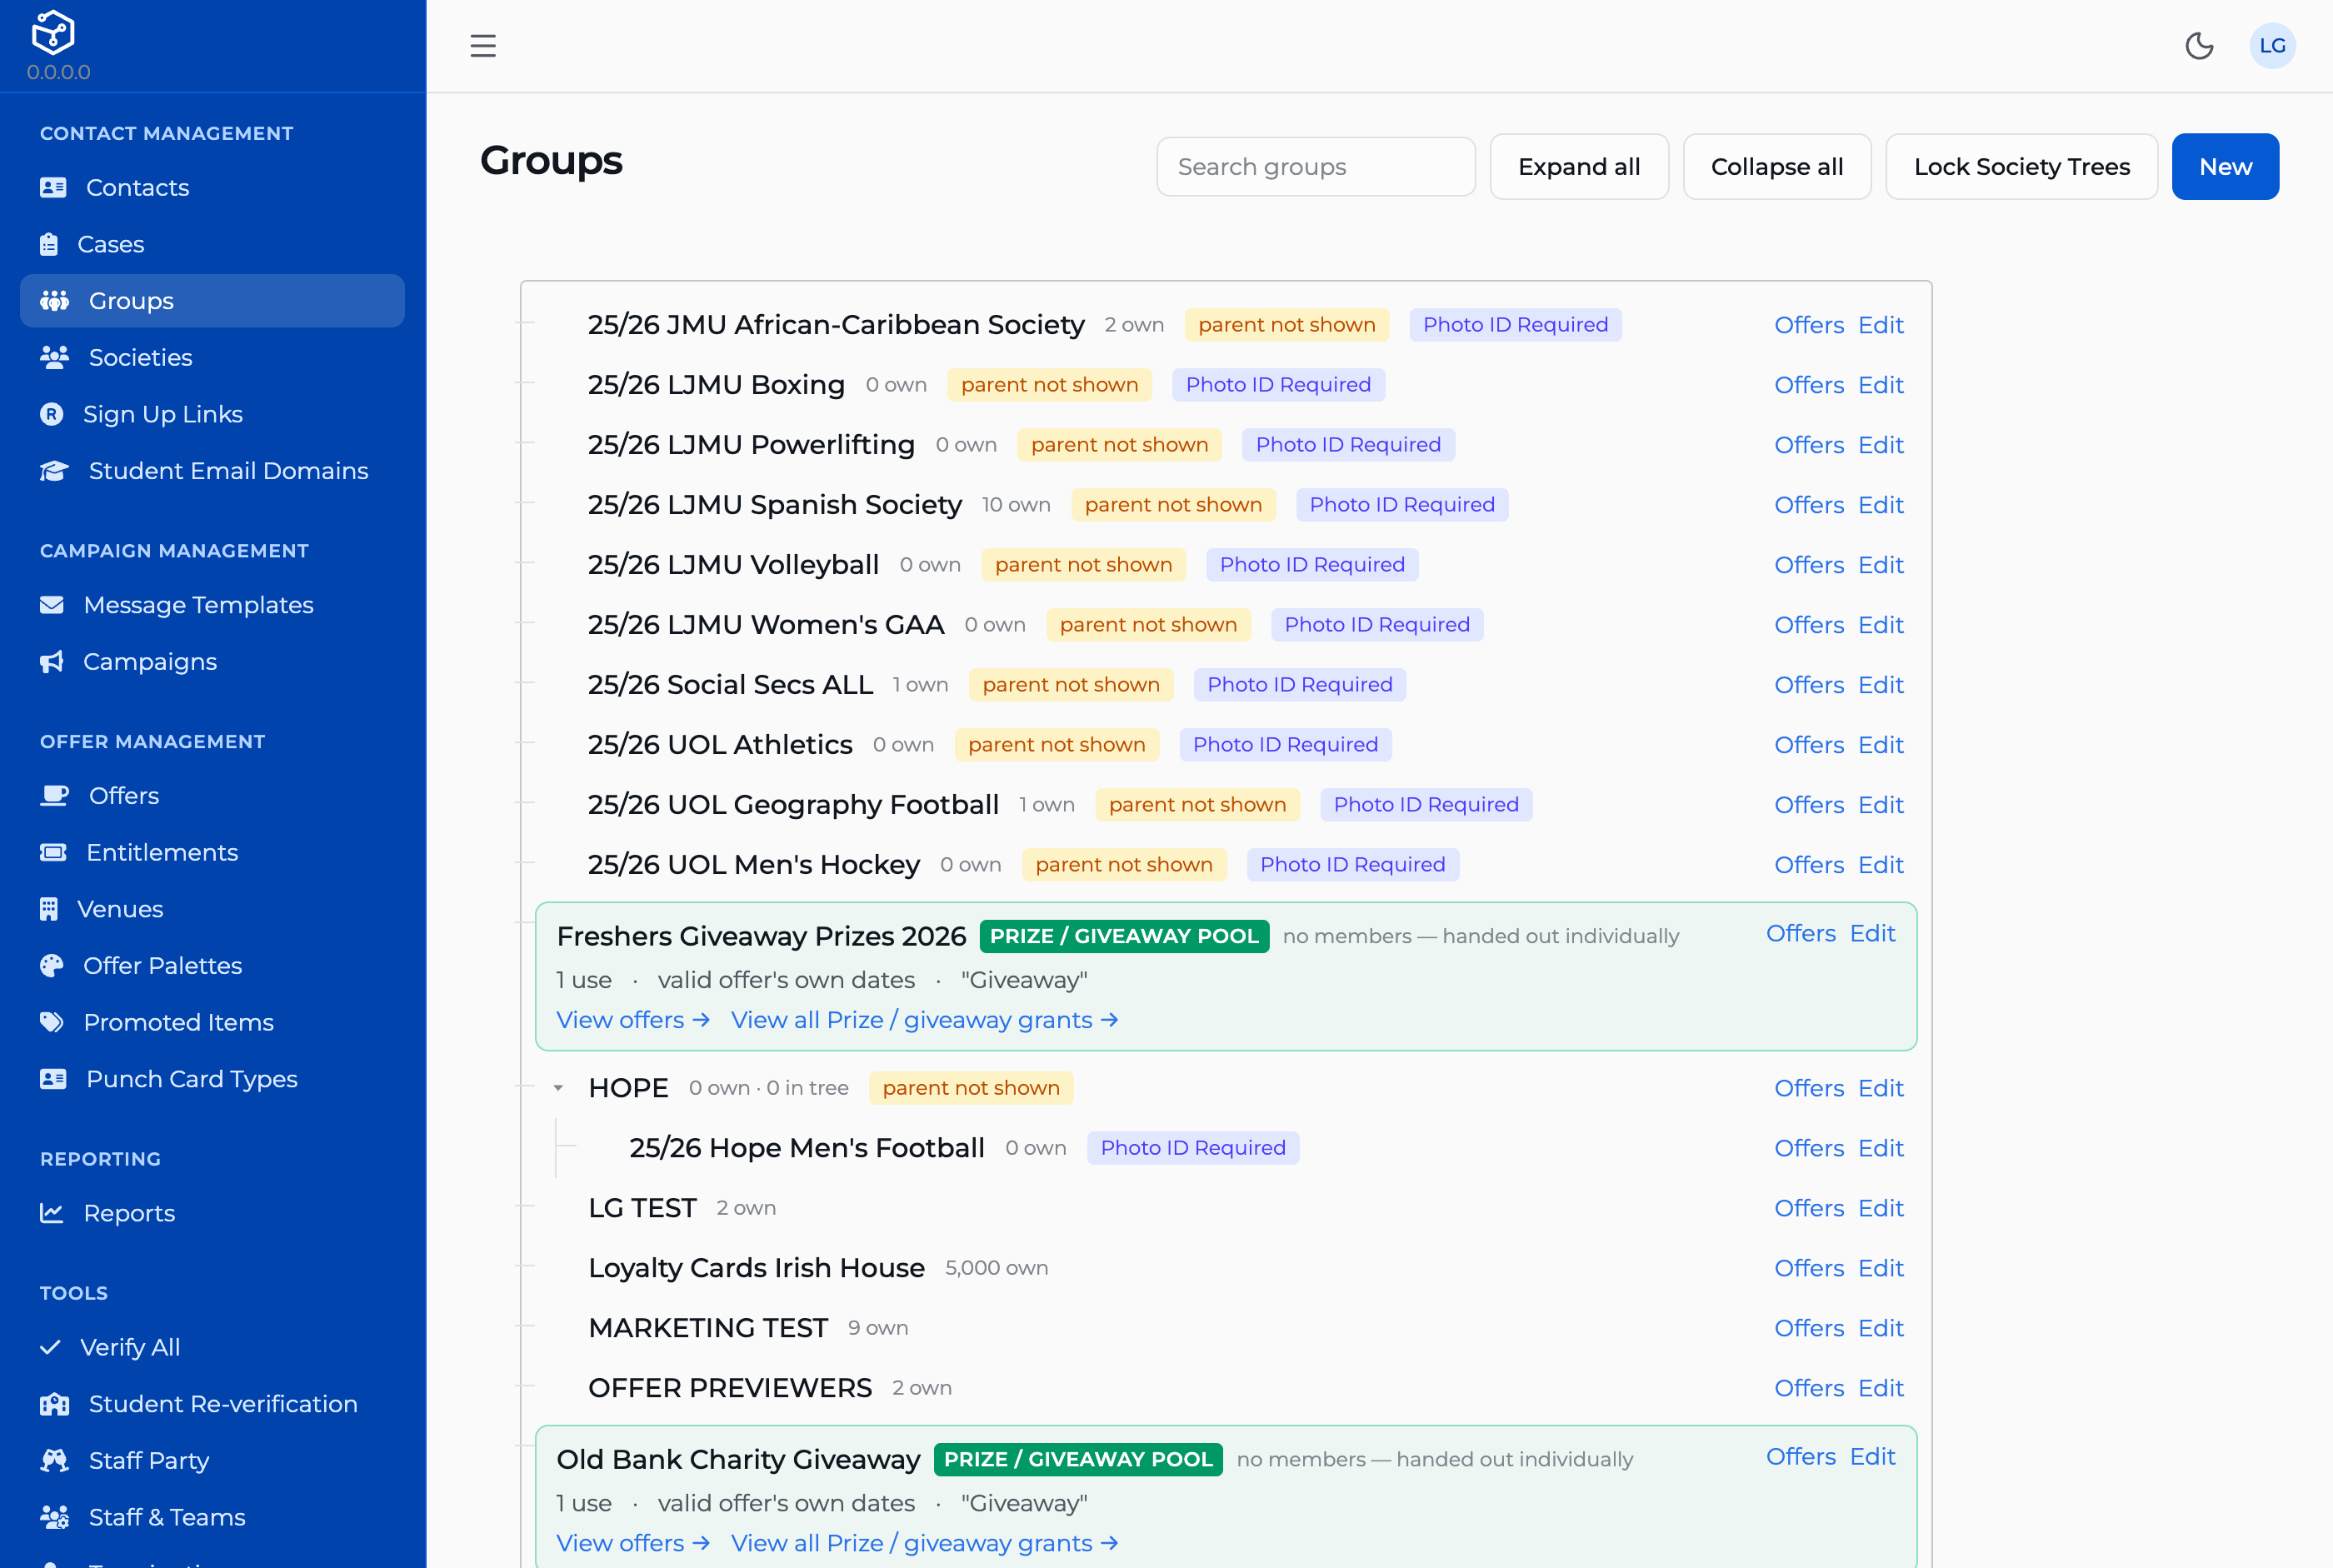
The Groups screen.
Creating a group, and choosing its parent
- Press New.
- Give it a Name.
- Pick a Parent Group, or leave it blank to create a root.
- Set Stop Date/Time and Require Photo ID if they apply.
- If you hold
entitlement-group:edit, you may also turn it into an entitlement pool here (A4, A5) — leave Entitlement Pool Type on "Not a pool" for an ordinary group. - Save.
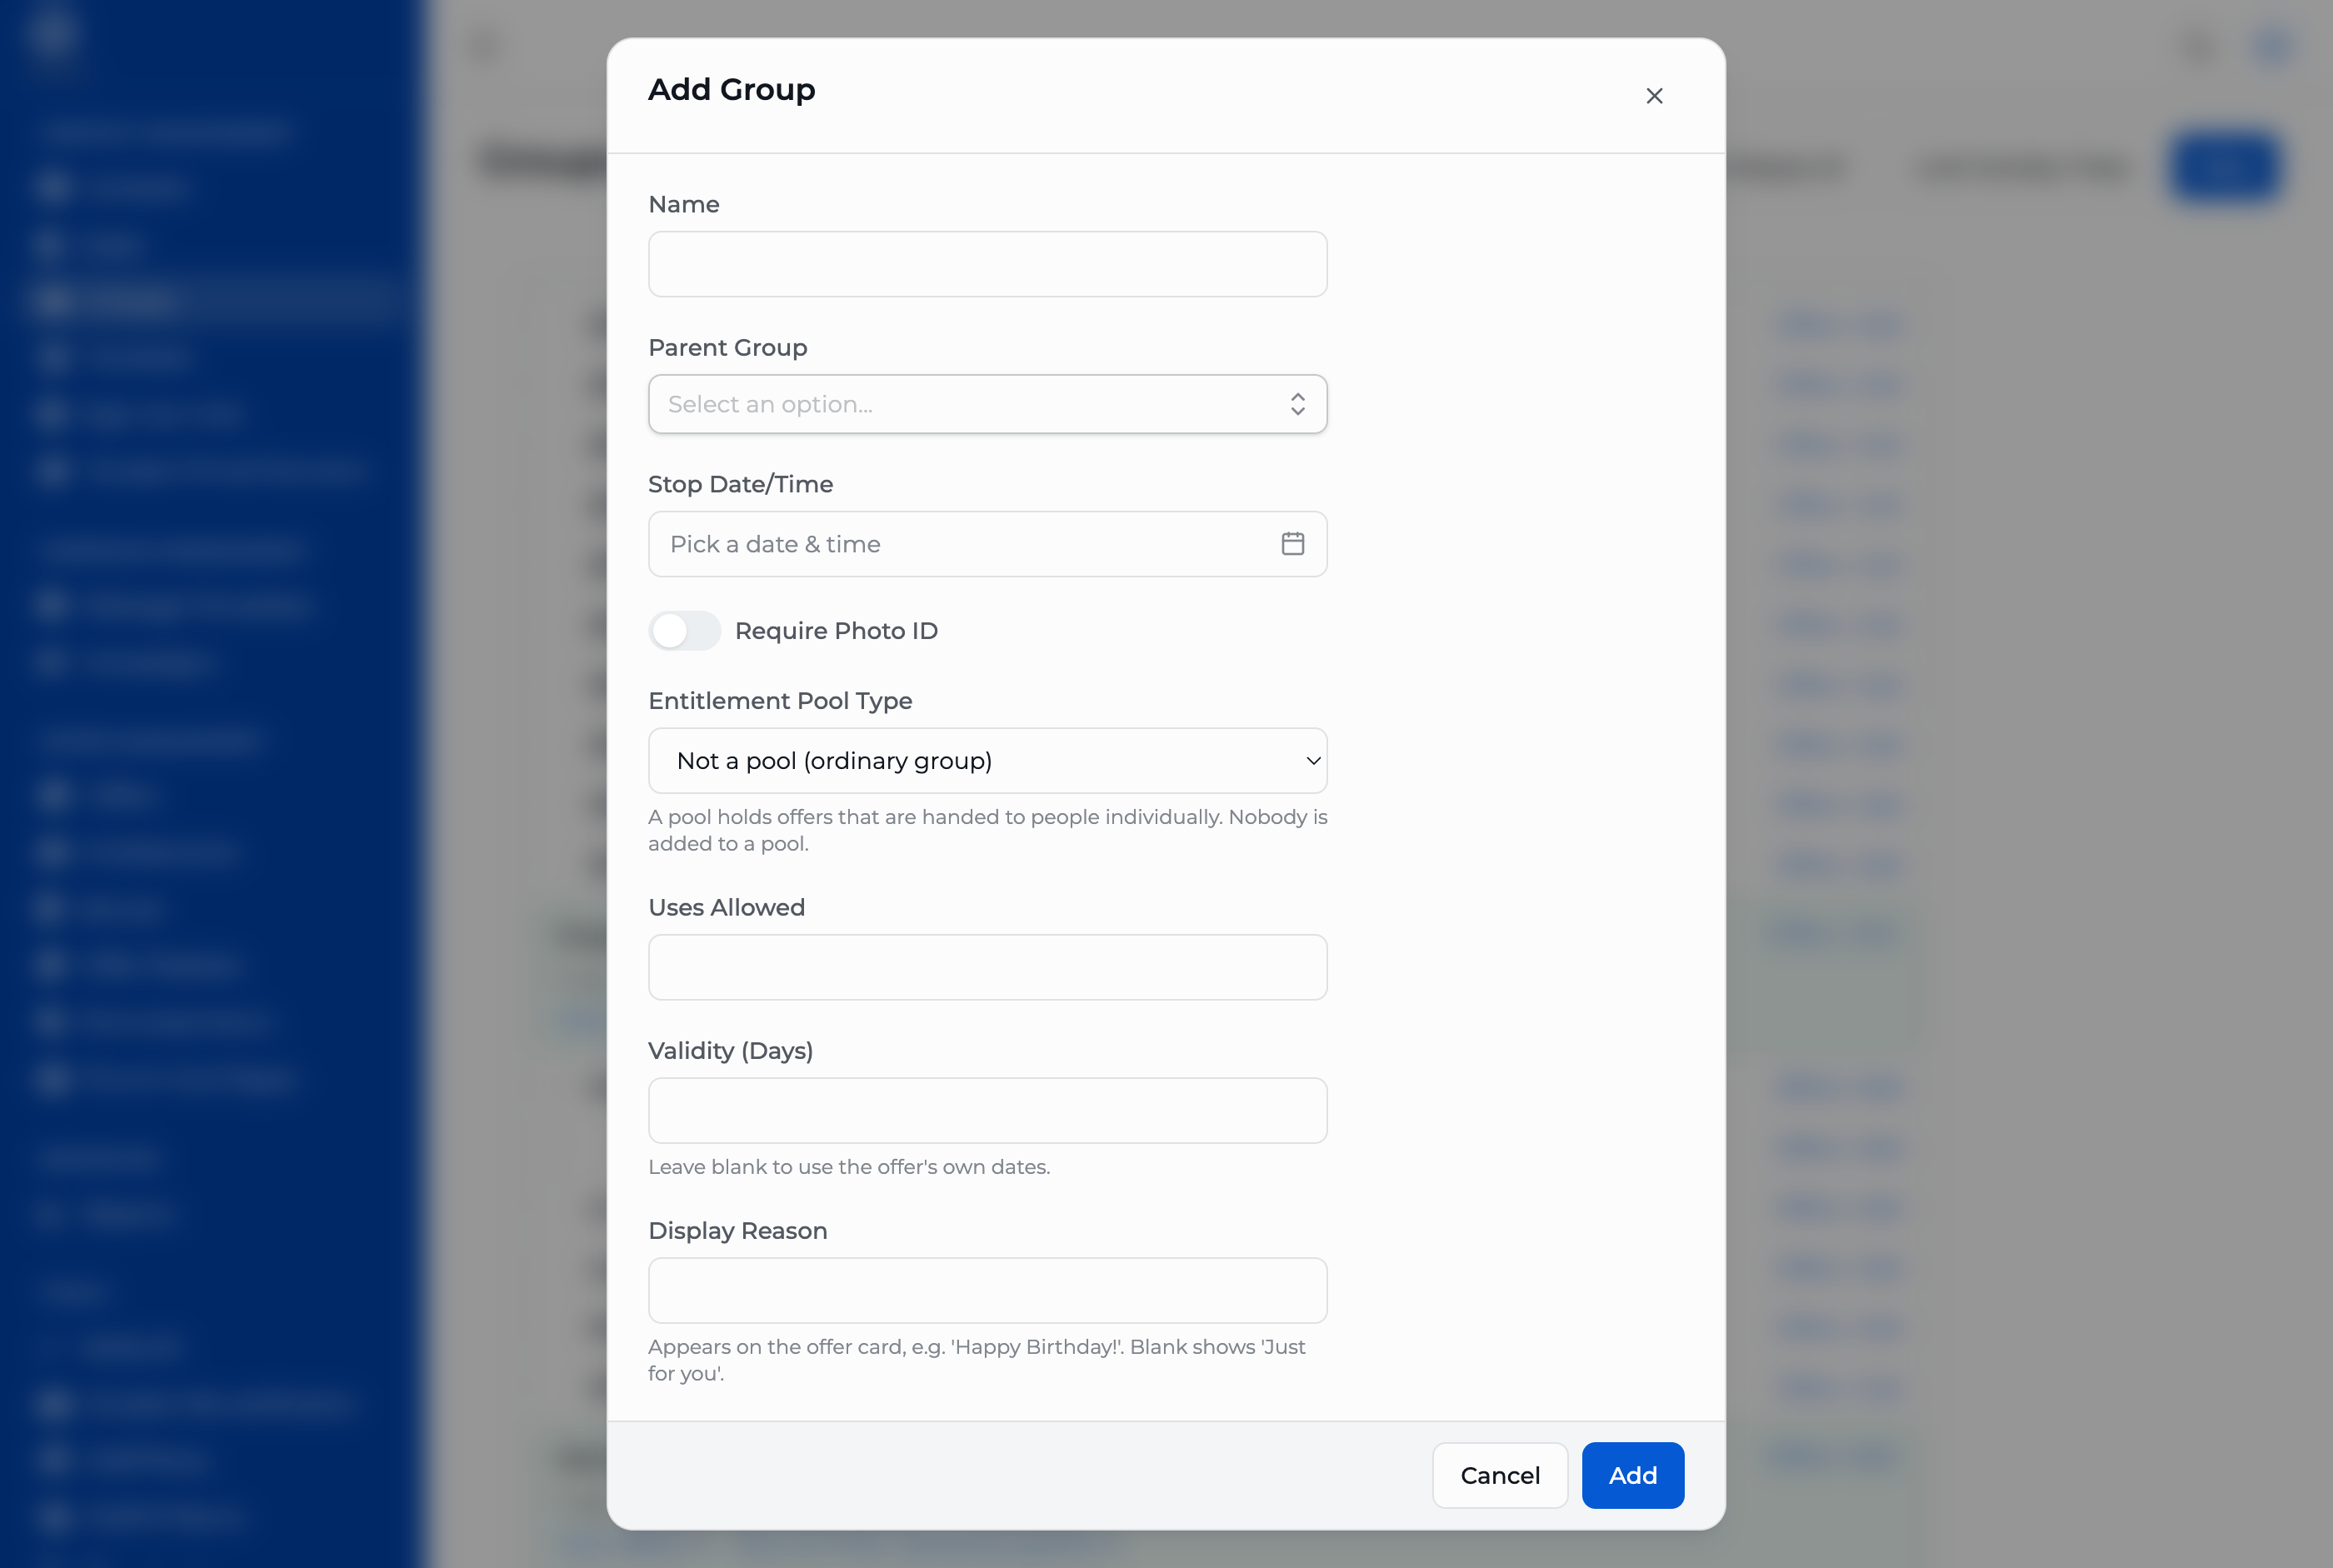
The group form. The same form is used to move a group, by changing its Parent Group.
The Parent Group picker already leaves out groups inside a locked society year tree, so you cannot pick one of those by accident. It does not leave out entitlement pools, though: choose one and save, and the CRM refuses it, because a pool has no members and anything parented beneath it would inherit its offers with no grant and no record of one (A4).
Moving a group
Open an existing group and change its Parent Group — there is no separate "move" action. The same rule applies as above: the new parent cannot be a pool, or sit beneath one.
The society year trees will refuse some edits.
You cannot rename a clone-managed group, move it, or add a group inside it. That shape is read back by the academic-year rollover, and a group added by hand either gets left behind at rollover or drags its members into the wrong year. Its stop date, photo-ID setting and entitlement settings all stay editable.
Stop dates
Every group carries a Stop Date/Time, editable even on a clone-managed group.
A stopped group disappears from this screen.
Once a group's stop date passes, it no longer appears anywhere in the Groups tree, the group search, or any group picker in the CRM — there is nowhere left here to open it, check it, or push the date back. Set it further out than you mean to stop using the group, not right up to the moment you want it gone.
For a society's year groups specifically, the academic-year clone sets this automatically at rollover, bringing an old year's stop date forward to match the new year starting — never pushing an earlier date back.
Hidden groups
Every group also carries a Hidden setting, but the group form here does not expose it — there is no box to tick to hide or unhide one. A hidden group is left out of the tree, the search and every group picker entirely. Hidden groups you will encounter today were created behind the scenes by another part of the system, not by an operator — the group backing a promo-code pool, for instance, is created hidden automatically. The one place a hidden group surfaces at all is indirectly: if a group you can see has a hidden parent, it is lifted to the top level of the tree and marked parent not shown, so it is not lost from view even though its real parent is not shown.
Reading the tree
The tree shipped a rework recently, worth knowing before you go looking for something in it:
- Root groups arrive expanded; everything below them starts folded. Expand all and Collapse all in the header override that for the whole tree at once.
- Searching matches on name and keeps every matched group's ancestors visible, so a hit shows up in context rather than as a bare name with nothing around it.
- Each group shows its own contact count, and, where it has children, a second count for everyone in its subtree.
- A group whose parent is hidden appears at the top level marked parent not shown (above).
The structure lock
CRM → Groups → Lock Society Trees (admin only). This is what turns an existing, hand-built society tree into a clone-managed one — for trees built before the lock existed, or as a one-off catch-up. It does not build anything; it only marks groups the clone would already recognise as belonging to a society's year structure.
- Open the dialog. It previews automatically, working out each tree's boundary by reading the group names in the estate.
- Read the count — how many groups it would lock, and how many are already locked.
- If any societies could not be placed, they are listed and left alone rather than guessed at.
- Press Lock N groups.
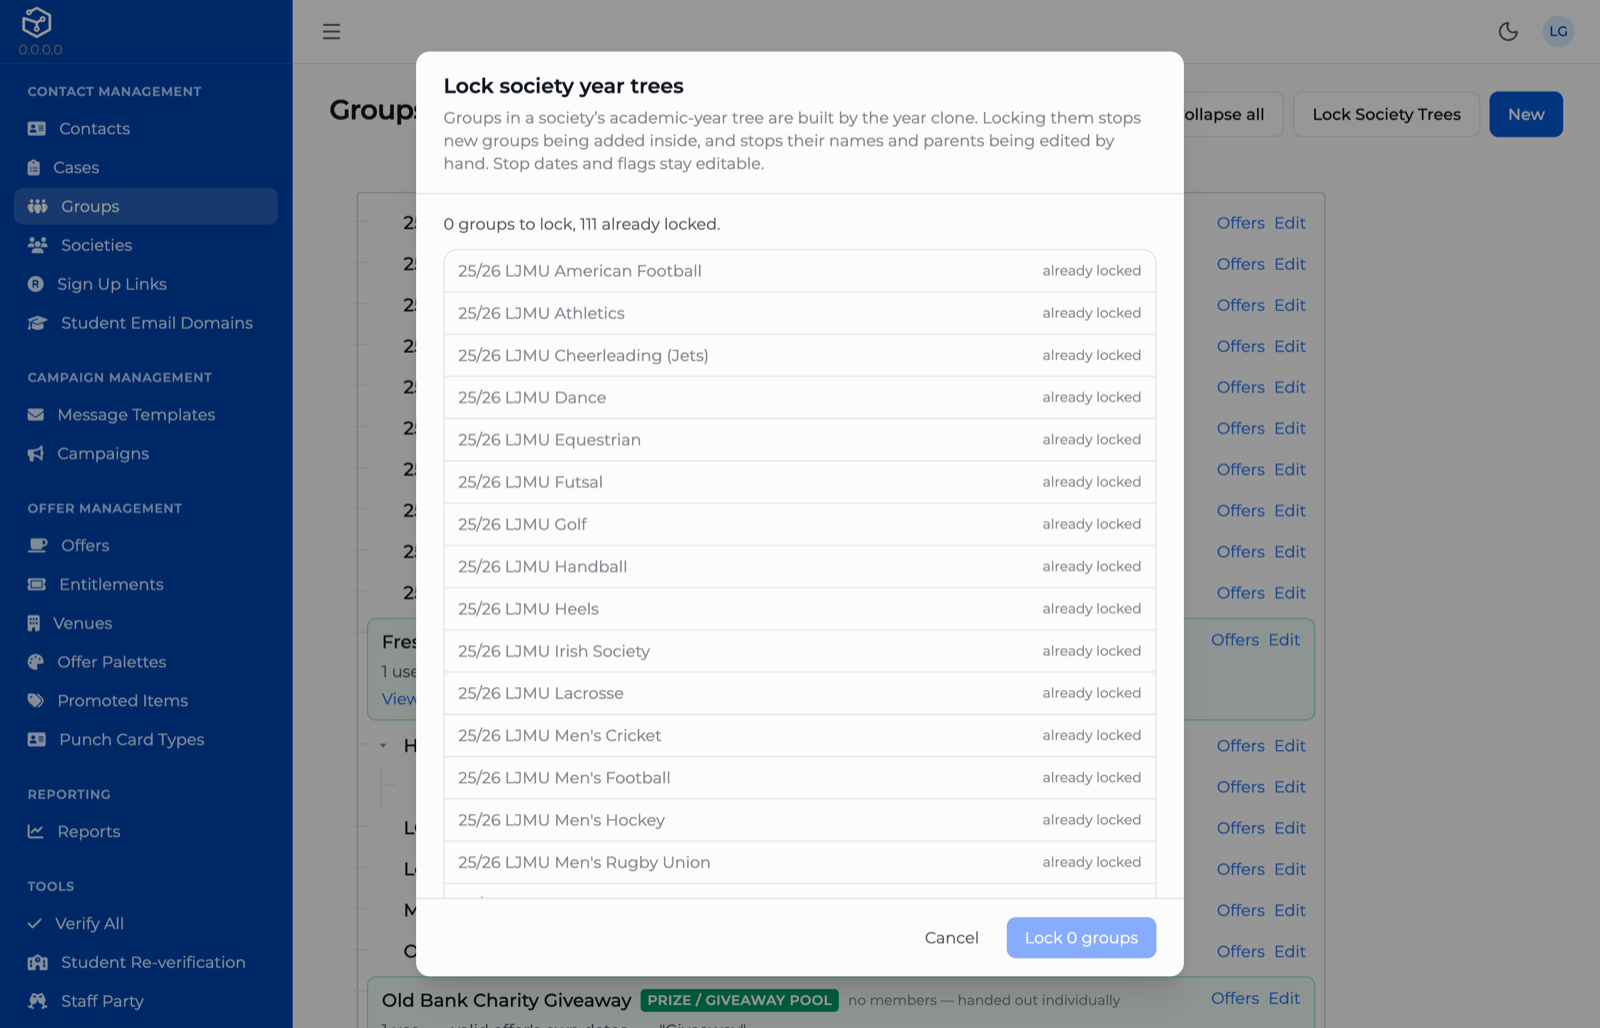
Previewing a structure lock before running it. Here every tree is locked already, so the count reads "0 groups to lock, 111 already locked" and the button offers nothing to do.
Because the boundary is derived from group names, this is the one operation here whose correctness depends on the estate being named the way the clone expects — worth reading the preview rather than pressing straight through it.